Showing posts with label Apartment Living. Show all posts

Friday, September 13, 2013

Making Our Apartment Our Home: Kitchen

Today's post on our apartment tour is the kitchen (aka pain in the butt).  Okay, so agree with me that all apartment kitchens are kitchens from hell...they are all so small and crowded!  However, in comparison to my apartment kitchen when I was living in university housing, this is much better.  We at least have three sets of outlets, a bit more counter top space, and more cabinet space.  But after all the wedding gifts, the storage just wasn't enough.  That's why we implemented the coffee bar (which is just to the left of our stove in the dining area). 


We were able to stack a candy jar and the panini grill on top of the microwave - I'm sure we use it much more often when it is in sight than if we packed it away every time.


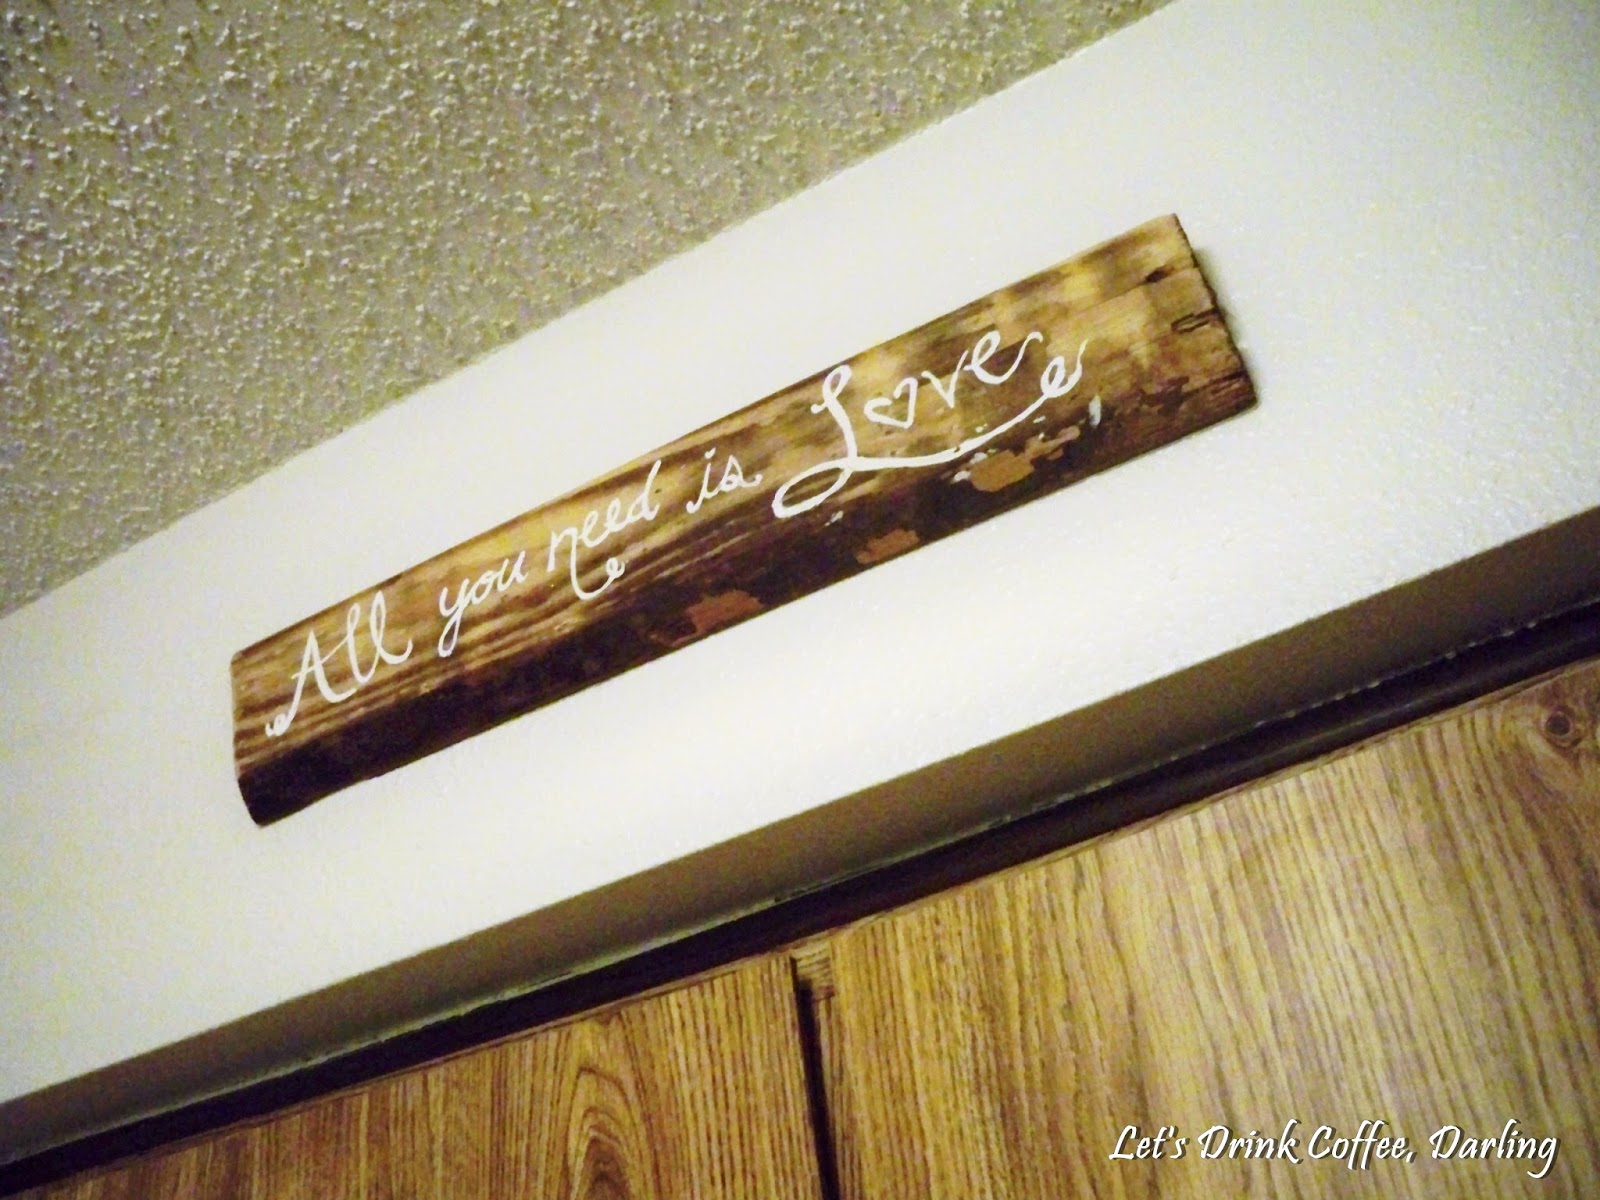
Above our cabinets, we hung one of the signs our friend made for my bachelorette party/wedding.  Those came in handy not only for wedding decorations, but for home decorations too!
Our friends made us the spoon hangers that we hung and currently have pot holders on.  Haven't decided what else would hang well on there, unless we get some oven mitts.
Oh, and did I mention that I love the orange and red poppy towels?

We asked for the tall glass canisters on the left for our wedding registry, and are really glad that we received them!  They are super helpful for keeping our often used dry ingredients such as flour, sugar, and brown sugar in.  Then of course we have the coffee pot (which is not on the coffee bar because we didn't want to worry about spills staining the carpet).


By the sink, I put some large rocks in a mason jar to hold our cleaning brushes.  Every once in a while I toss the jar and rocks in the dishwasher to sterilize them.

I'm really a fan of hanging things in the kitchen, so we have our measuring cups and spoons hanging from the cabinets.  One day when I have our own house, I'll definitely be implementing some exposed hanging utensils.  Maybe on a copper pipe?  Maybe I'm just dreaming now...

All in all, for an apartment kitchen, it works pretty well.  Behind the red curtain is the laundry area, as well as where we keep a utility shelf and the trash can (super crowded in there).  But hoping one day will allow for a larger kitchen!

If you missed the other posts from the Making Our Apartment Our Home series, you can see them all HERE!

Also, don't forget to check out the coffee bar post, as it is adjacent to the kitchen and offers us some extra storage space!




Friday, September 6, 2013

Making our Apartment our Home: Bedroom

Today, I'm showing you our bedroom!  

We really wouldn't have much of a bedroom if it weren't for our families - kind of like we would similarly not have living room furniture without them!

Hand me downs are really great - especially for newlyweds just getting started!  The entire set of dressers and night stands are a set that Tyler's parents gave us - which has helped out tremendously!  

Below is the bed and our wedding quilt!


The above quilt was our wedding gift from Tyler's parents - made by his mom!  As you can imagine, she spent a lot of time working on the quilt for us!  


Here is the night stand - part of the set Tyler's parents gave us.  The lamp was also given as a wedding gift - we've really enjoyed it!

I made a recent change over our bed with pieces of burlap put into picture frames to spell our family name.


I hung this shelf on my side for my scarves, and on top I have (left to right) a gift from a Chinese friend, one of my favorite pictures of us, and a wooden grasshopper toy that I played with as a kid.

I found this mirror at a yard sale recently!  I've been wanting a self standing mirror for a long time, so glad I finally got one!  Below the mirror I have several keepsake boxes, the 150 Days Away book for Tyler, and my three favorite stuffed animals!

Ladybug and Frog were my best buds since I was little!

 The mirrored dresser set and the necklace hanger I recently made from a wood sample (far left) - it works like a charm!  I just nailed the toothed hangers on the back.

Love being able to display my antique tins on this!


Missed the last part of the apartment tour? Keep up with the series here!

Monday, August 26, 2013

Making Our Apartment Our Home: Living Area

There's not just one thing we like about our apartment.  It is in a safe neighborhood that is close to most of the highways that can take you anywhere in Oklahoma city.  It is well taken care of.  They put brand new carpet in before we moved in.  They keep maintenance up so well that it's *almost* annoying how much they come do stuff.  One of the best parts - it is spacious.

That's what we like most - and needed most - in our living area.  Space.  

Pretty much every piece of large furniture in our living space is a hand-me-down from relatives.  With that being said, we didn't exactly get to pick pieces that fit well together on walls.  Instead, we have a long couch (that is a hide-a-bed), a recliner, and a rocking chair with an ottoman.  Let me just say that as far as arrangement goes, we didn't really have other options than how it is due to how things fit.
The coral chair and couch have been through several family members - most recently from my parents to me.
The white chair was from Tyler's parents.  We're really glad we have lots of seating!
As you can see, due to pathways and limited wall space in certain areas, we had to arrange the couch caddy-cornered so that the rocking chair and recliner could go on either side since they couldn't be too close to the wall or each other because of their extra mobility.

We tried our best to make the best use out of the lost space behind the couch and keep a lighted tree, a small table with a lamp for aesthetic and functional uses.  The table works great for drinks and is nice to have a lamp so close to the couch. We also keep a basket of blankets and Tyler's video game chair all hidden on the floor behind the couch so they aren't cluttering the place, but have easy access.
Sorry for the random jar - my goal is to at some point when I'm at the store to remember to buy some dum dum suckers to put in it so I'll have something to chew on besides my finger nails when we have LOST night at our apartment.  Bad habits, I know.

The couch isn't our absolute favorite piece of furniture - it doesn't work very well for actually "lounging" or sitting comfortably.  The pillows always get lumpy, and the cushions always come out.  I'm looking forward to the day we buy a different couch, but this definitely works for now for newly weds. :)


***Update***
We have since added this piece of art that we found at a yard sale...it is from Taiwan! (If you know me well, you know that I love that it is from Asia!)

Adjacent to the chairs we have the TV, which is next to the front door, so we have a shoe rack beside it.

I like to have bragging rights for that TV stand, because I bought it at a yard sale for $2.  That's a deal.
But now that it isn't just holding a TV and DVDs and has upgraded it's life to also housing all of Tyler's video games, it is getting to be a bit too small.
***Another Update***
We found this cool tree ornament at ANOTHER yard sale for just $2!  It is hanging above the TV stand.


On the separator wall to the kitchen, we have a console for the stereo and storage for board games and movies.  It is also a nice place for some decorations.

Next to that below the connecting window between kitchen and living is a little coffee table.  We have Tyler's chess set that I bought him in China, a painting of his grandpa's and some other knick knacks.  Eventually we want to have this framed...but have you seen the prices of custom frames?  Kind of ridiculous for a few pieces of wood and a piece of glass, if you ask me.

And that, my friends, is our living room!  Not much, but the best part is that it is spacious.  We still need to find or create some large pieces of art for our large walls too, but hopefully we'll be here a long time to work with it!

Missed the rest of the apartment series?  Catch up HERE!

Monday, July 22, 2013

DIY Towel Holder

Today I'm showing you a DIY Towel Holder I made for our bathroom.  This towel holder is perfect for people who move around a lot - or when you've still not settled into that final place that you'll always call home.  


We recently (well, if you call almost two months recent) moved in a new apartment.  The problem was the bathroom only had one towel rack - enough for each of us to have a bath towel folded on the rack together.  There was no where for a hand towel, so I took matters into my own hands.  

I didn't want to install actual hand towel hardware into the wall, since we'd just have to fix a huge hole once we move out.  With this transportable wall hanging towel holder, we can hang it in different places while only leaving two small nail holes in the wall - easily fixed with a tiny bit of wall putty.  


The hand towel rack I came up with started out as just a plank of scrap wood as seen below.  


I stained the wood with MINWAX Special Walnut 224 stain, which I ended up really loving the color.  It has that dark look that I love without having red tones.  I bought it at Walmart!  Amazing, huh?


After you stain, all you need is a plank of wood, a drill, and go buy a towel holder package.  You might need a shorter screw than the one they give you in the package, since that is intended to go into the wall and not a piece of wood.

Here's what you'll need for this project:
  • A packaged towel holder (can be bought at Lowes, Home Depot, even Wal-Mart).
  • A plank of wood (large enough to accommodate chosen towel holder).
  • A drill and drill bits.
  • Wood stain and a cloth.
  • Shorter screws, depending on the thickness of your wood.  You don't want the screws to go through.


Follow the instructions for attaching the towel holder to the wood, except using common judgement with some parts.  With mine, I just screwed in a plate to the surface of the wood (using shorter screws), and drilling the holes first.  After the plate was attached, you just place the towel holder over the top and there is a screw that can be turned at the bottom to attach it to the plate.  Of course, each type of towel holder may be different.  

To attach to the wall, I just drilled small holes in the back of the wood (that DO NOT go all the way through).  Then I put two nails in the wall equal distance apart from each other as the holes I drilled into the back of my towel hanger, as to make a recessed hanger.  

You could easily use the nail on hangers, however I was afraid it would wobble on the wall too much if it did not hang flat.  We have not had any problems with it falling off the nails, even though the holes are not proper recessed hangers.


Below is my finished product!


I've decided that I like the top half of my wood plain, for now.  If you are more the embellish-er type, you could always add some cute bathroom lettering to the top!

I always love hearing from my readers!

Copyright 2012-2014 Saxon Smith (Let's Drink Coffee, Darling). All rights reserved.
Related Posts Plugin for WordPress, Blogger...
UA-49062203-1