Showing posts with label createforthehome. Show all posts

Thursday, August 25, 2016

Redo Dining Table

Wow, it has been a really long time since I've posted on the blog!  


I've missed my blog posts, and have taken photos over the past year with the intention to curate some posts that I have just never put together to pose.  Tyler's grandma (probably my most consistent reader) mentioned she missed the posts, so I've decided to put together some new posts and do some rekindling on here.  


I will probably share some DIY projects, and I've gotten more into photography which has taken over most of my free time over the past couple years, so I may share some related posts in that category.
Today I'll be going over my dining table makeover from earlier this year.


Earlier this year, I decided to redo our dining table.  Some of you may remember when I added a mismatched leaf to this same table, well I've gained a little more courage, expertise, and 4 matching chairs so I decided to redo all of them to coordinate.

I had two main goals with this project:
-to lighten up my dining room with lighter and less yellow/orange colors
-to get the table and chairs that are not the same set to coordinate


I don't have a good before of the chairs - they were just that bad.  They were basically just a dark brown color.  I may do another post focusing more on how I redid the chairs, including recovering the seats.


To really capture a coordinated look, I decided to paint the frame of the chairs white and paint the table legs white, but stain the backs of the chairs and the top of the table with driftwood stain.


As you can see the original color was what I like to refer to as "orange glow" and also had a lot of dents and scratches.
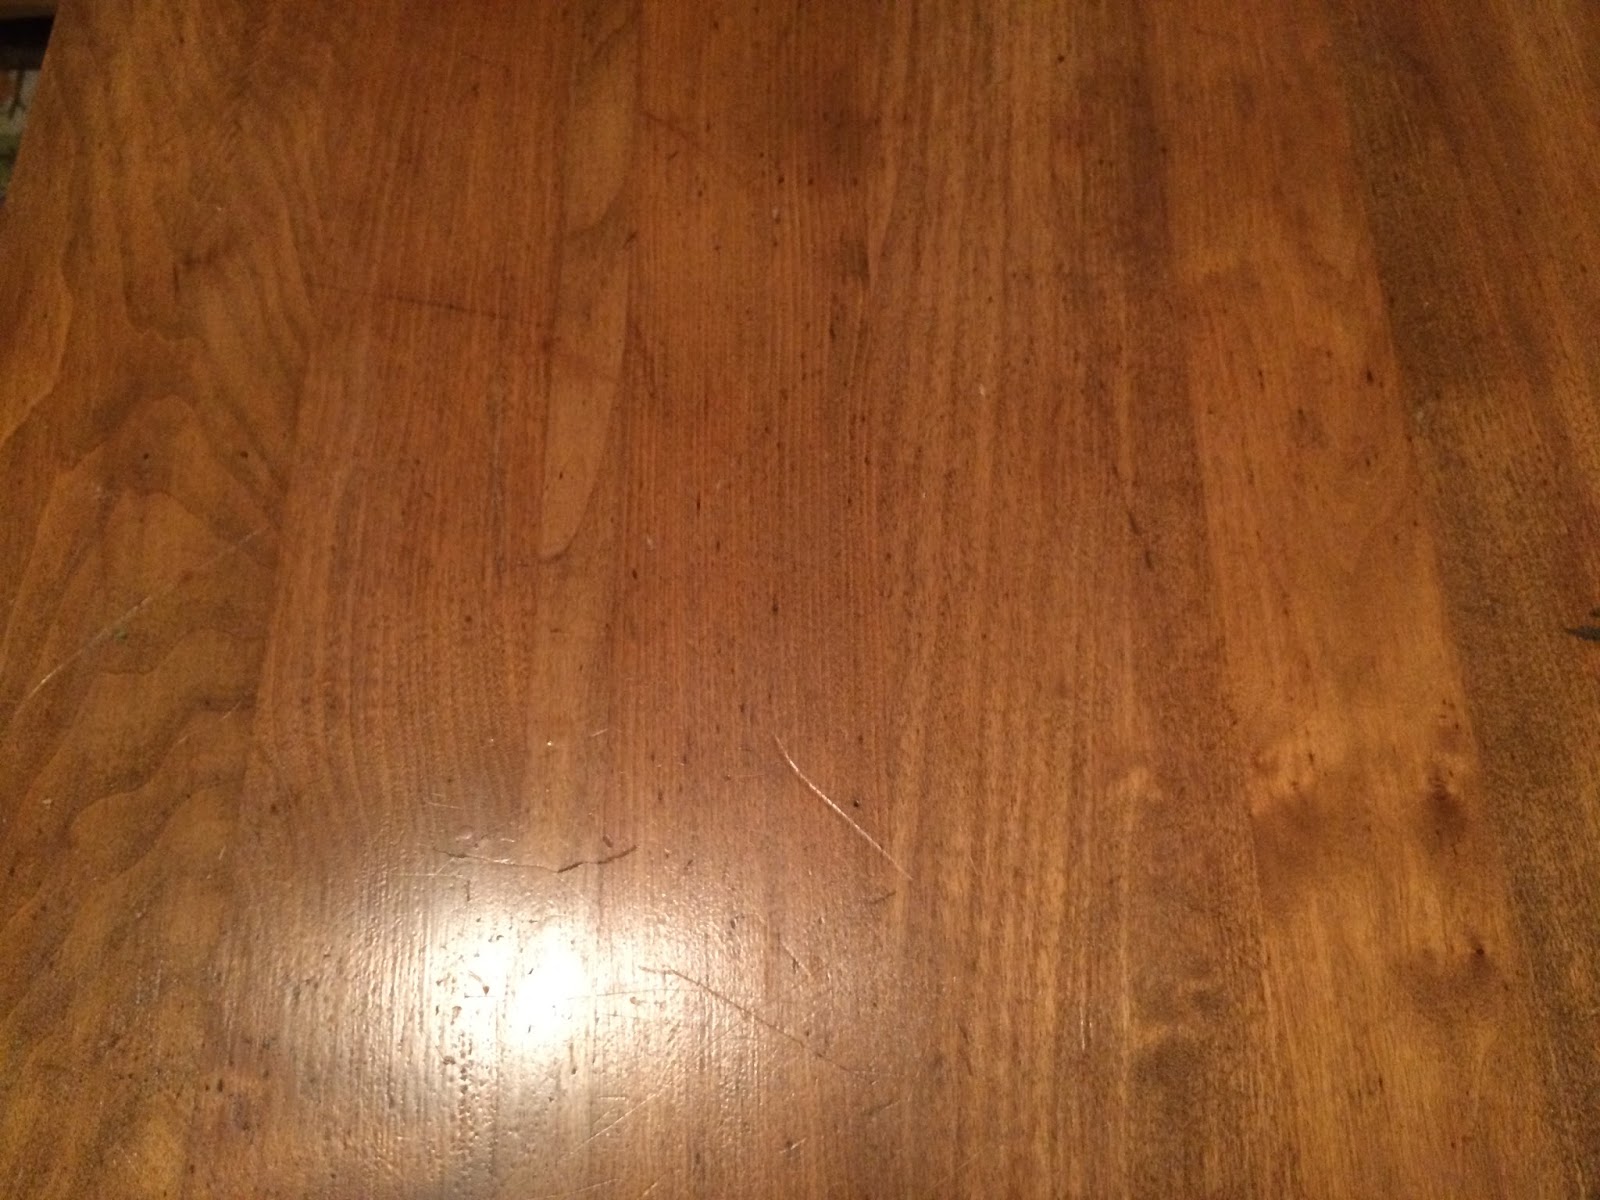

The table also had a thick varnish.  I used chemical stripper and a paint scraper with a dropcloth to get the majority of the gummy varnish off first.


Once you see the varnish lifting you can start scraping - be sure to wear gloves and don't let it get on you!


I probably used the chemical stripper 3 times with the scraper before sanding.


 You can start to really see the original wood color.


Now that there is no more shimmer or gummy varnish left, it is time for the sander.


I live in an apartment, so in order to keep noise and dust at bay I used manual handheld sanding pad.  It would be much faster to use electric.


See the difference already?


I'm an impatient person.  I couldn't just finish sanding the other half, I really wanted to see how the stain turned out.  I was also too impatient to take pictures, but keep scrolling as I did for the next half.


Same process with chemical stripper and sanding on the other half.


New stain vs. original wood.


For the stain process, I used Rustoleum's Driftwood stain and Minwax's Early American stain.


I mostly used the driftwood, but I added dabs of early american to add some warmth - the driftwood by itself is very gray.


Just use the rag or towel to blend the stains together until it looks even.

With the paint-stain, it tends to cover up a lot of the wood grain.  I still wanted to see some of it, so I used dry paper towels after I had rubbed all the stain in to bring back a little more wood texture.


The stain looks a lot lighter when it isn't dry.


See the makeshift leaf as before.  I used the same chemical stripper and sanding process, as well as the same staining process.  I believe I added a bit more early american to get the same tone since the natural wood was a lighter color on the leaf.


Table top all stained!


I believe I ended up going back and adding a touch more early american stain to the left side and the leaf.  You can tell they are more gray - it just needed a little more to warm it up.  It wasn't too much to just go back over in another coat.


 Looks like I didn't take any photos of the paint process.  Most tables have some screws or some sort of fastener underneath, it works best if you can flip it upside down where the top is on the ground.

Remove the legs and paint seperately on a drop cloth or plastic tablecloth (I love getting seasonal tablecloths on sale to use as cheap dropcloths).  I used Color Place antique white satin interior paint.  Once the paint cured, I have not had any issues with scratching, scuffing, and any food or coffee has wiped off easily.

Once I removed the legs and had given the top a couple days to dry, I took the top outside and used spray polyurethane to seal and prevent water damage.  I like using this because it doesn't shimmer like old style varnish, but still protects the work.

I did completely sand the chairs and table legs so the paint would have a surface to really adhere to.
I would say I did 3-4 coats of paint.  Painting things with four sides is very time consuming!


You can tell the stains set a bit differently on the chair backs and table top in the photos, but it is less noticable in person.  We've really loved our table since pulling it together and making it really look like a dining set.


It may be the second time I've redone this same table since we've been married, but I've loved it so far so I think it will stay the same for a while this time!
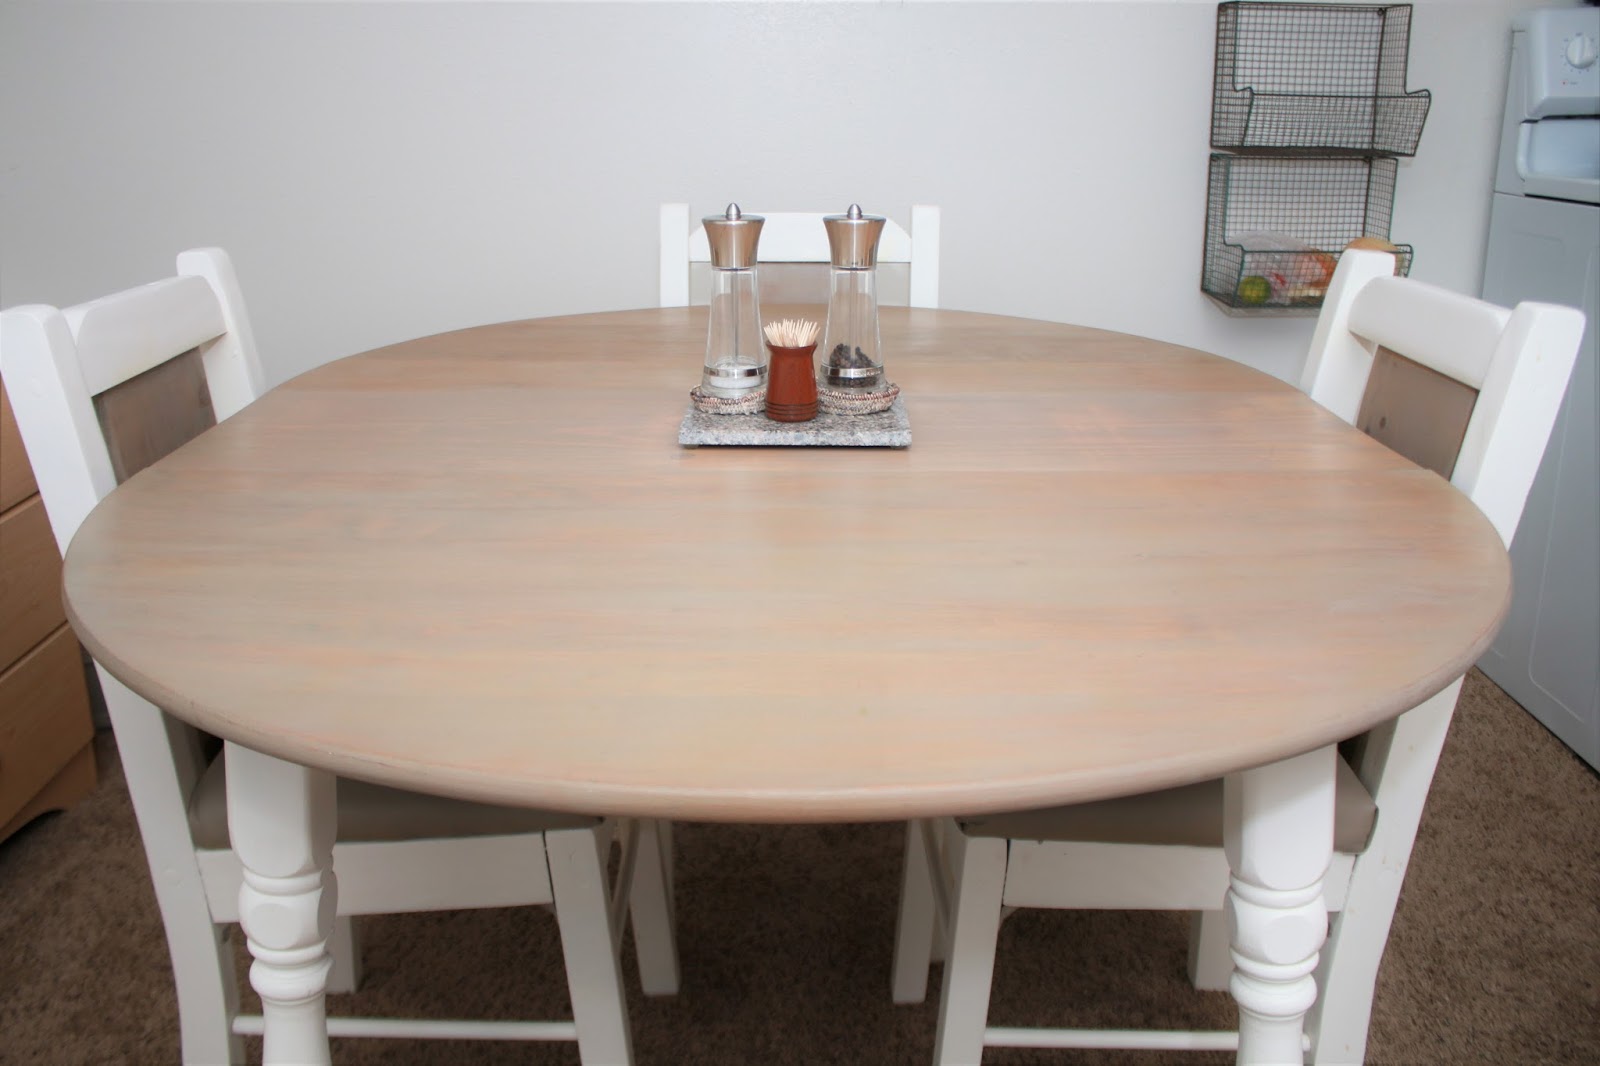
I've enjoyed creating this post - hopefully more to come soon!

-Saxon

Saturday, April 11, 2015

Simplistic Spring Wreath


It is finally Spring, after all that snow the US had this winter!  Finally. 

I've already had to keep the weather on all evening due to severe weather, had tornado sirens go off in my area, video crazy hail and wind, worn shorts and flip flops, and do some deep spring cleaning in our apartment.

Earlier this year I was inspired by a simple wreath I saw on Pinterest.  I don't make it to the craft store often, but had some extra time this weekend while the husband was on a camping trip and took some time to get the supplies.  What I loved about this wreath idea was that it was mostly fresh looking greenery and wasn't focused on colors or being completely full and covering the whole grapevine.  


Products:
Two bushes of greenery (varying textures)
Single stem of light colored flower
Grapevine wreath

Supplies:
Wire Cutter
Floral Wire (or other small wire)


I really envisioned the focal point of this wreath being in the lower left part of the wreath.  I took the longer stem of greenery, snipped the stem about halfway, and then stuck it into the wreath.


Then I cut off a small section of the boxwood and sat it aside.  I snipped half of the long stem off and also stuck it in the wreath, angled just above the dangling greenery.


Then I took the small piece I sat aside and angled it coming out the opposite direction as the larger boxwood.


Next, I took the rose and experimented with how it looked best.  I determined that I would need to curve the stem close to the flower and then stick it directly through the wreath so that it would sit the way I wanted it to.


Once the stem was through the back, I wrapped it under one of the main stems holding the wreath together.


I kept wrapping until the stem was fully hidden behind the wreath.


The stem was curving out past the front of the wreath in one place where it was curving, and since it is more red than the other branches it was noticeable.  I took some floral wire to tack it down in the back.


 I just wrapped the wire around the stem and some branches in the back to help pull it out of sight.


Next, I needed to tack down the small branch of boxwood because it didn't have a stem long enough to ensure that it would stay put.


My camera battery died, so I didn't take pictures, but I also just made a loop of wire in the back to hang it to the door knocker on our front door.


My favorite part about this wreath is how simple and fresh it looks, and really adds some life to our otherwise drab door!

HAPPY SPRING!


post signature

Thursday, March 12, 2015

Industrial Lighting on Hometalk

Recently, I joined a site called Hometalk, at the recommendation of one of my lovely commenters.  

At first, I didn't really get on, but lately have rekindled an interest in the site.  The best way I can describe it is a Pinterest that is mainly for home and diy projects, and instead of only one image with a short description, you can look at a mini-blog post with an overview of the project.
It is helpful to viewers since we all know how annoying it is to click on a pin and once you get to the site, the creator of the post actually mislead you to think the post was about something else.  This way, you can know more about the project before ever clicking the poster's link.

It is also helpful for bloggers, since we can share more of the specifics of our projects, and to a more specific set of readers.  The Hometalk community feels significantly smaller than Pinterest, which allows you to actually interact more with other users.  Unlike Pinterest, clicking a clip takes you back to the original post, so you can always connect with the writer of the content.  Just like you can comment on a blog post, it is typical in the Hometalk culture to comment on others' projects.
I've posted some of my DIY projects first posted here at Let's Drink Coffee, Darling and was contacted by one of the community managers to curate a board within the same genre as my DIY Industrial Cage Lamps.  There were so many great DIY projects for industrial lighting on Hometalk, so I'd encourage you to head over and check out the board!   And if you're also a DIY blogger, it may be worthwhile for you to consider posting some of your projects as well!
Check out some of the features from my Industrial Lighting clipboard!

Maybe I'll see you there, don't forget to connect with me on Hometalk if you have an account!
post signature

Monday, November 24, 2014

Special Pictures Documenting Life in our First Apartment

In your first year of marriage, there are a lot of firsts.  
Some memorable firsts are our first meal together after our wedding (which happened to be at a Burger King in a gas station, which I think is hilarious).  I remember the first few times I used "my husband" when talking about Tyler to someone who didn't know him, and how new it seemed when it rolled off the tongue.  
Probably the most memorable thing that was "ours" in our first year, however, was our first apartment together.
 

To remember our first year of marriage, I made a yearbook compiled of pictures of us and things we'd done between May 18th of 2013 until May 18th of 2014.

A special project for just one page of that yearbook were these photos documenting us in our first apartment together.

I wanted to portray our apartment itself, but I also wanted to show how we decorated, what furniture we had, how we used those rooms, and us in those rooms.  We just set up the tripod and tried to get an angle of each space to define what it means to us.


Blogging was a big part of my free time during our first year of marriage, and I spent most of my time writing and editing pictures at our dining table.


 Tyler's favorite "spot" in the leather recliner, and the infamous blue couch with lumpy pillows in the background.  


I'd like to think in the future we'll remember good times on that lumpy, uncomfortable, style inhibiting blue couch: our many nights spent watching LOST, Breaking Bad, Sons of Anarchy, and The Walking Dead, watching the ducks sit and waddle on a frozen pond out the window in the winter, and the zooming hummingbird in the summer.


I will always remember cooking and cleaning in our cramped little kitchen with the red curtain to hide the trash can, washer, dryer, and makeshift pantry shelf.  Where we first used so many wedding gifts, learned more about each other's food preferences, and how to stack a million dishes in one cupboard so that all your wedding gifts fit and can be used.


In our bedroom, we'll remember the places we got ready for work.

A few of Tyler's decorations and sentimental pieces are a backdrop to every morning, as well as the wall quilt his family gave me upon our engagement.


On my dresser and the decor near it are many of my favorite things:  a clock for my birthday from my sweetest roommate in college, a picture of my favorite thing - a ladybug - from Tyler in a frame, several tins that I adore, my necklaces, and a wooden box from my grandma where I store my makeup.


Also in our bedroom is our precious wedding quilt, made by Tyler's mother.  The standing mirror is one I found at a yard sale, which is an interesting hobby of ours as well.

Finally, at my craft table is where it happens.  Or more like where the storage happens...because as my sweet husband fully knows, most of my crafts end up in the living room floor rather than on the craft table.
 
I couldn't be happy without creating something, so as full as my very full table is with the storage of many different supplies, it means my heart is full from all the fun things there are to create!


Moe and Picasso, our pet fish, also inhabited our office/craft room.  We enjoyed their cute wiggles in our first year!

I edited the photos so that they were all black and white and would look cohesive on the page in our photo yearbook.  


Although it is merely one page of our photobook this year, I know in years to come we will appreciate this glimpse into our past at our first apartment - even just seeing how our decor and belongings evolve as we evolve.  

How have you captured and presented memories of some of your firsts?
post signature
Copyright 2012-2014 Saxon Smith (Let's Drink Coffee, Darling). All rights reserved.
Related Posts Plugin for WordPress, Blogger...
UA-49062203-1