Showing posts with label createvalentines. Show all posts

Tuesday, February 11, 2014

Valentine's Decorations

Today I'm showing you some of our Valentine's decorations that I've got up around the apartment!  Tyler and I aren't huge into Valentine's, however I do like to add a few decorations.  In general I don't want to just put up something meaningless, so I've framed all the Valentine's cards that Tyler has given me (and one that I gave him) to hang up.

We've kept our Valentine's cards that we made for each other over the years, so I figured what better and cheaper way is there than to simply frame our old cards?  I selected cheap frames from Dollar Tree (you could also find better frames at good prices at thrift stores) and fill them with the cards.  

This is the first Valentine I made for Tyler back in 2011 on our first Valentine's Day!  I found it recently in Tyler's stuff (that I'm still organizing or "hiding" as Tyler calls it).  I just had to add it to the rest!


In the vase behind the frame I added a couple of the photobooth props from our wedding with red flowers! 
This was Tyler's Valentine to me in 2011, again our first Valentine's Day as a couple!  I love that he actually went out and bought supplies to make me a card!

And then this card is from 2012!  I feel like my hubby is pretty creative when he wants to be!

I keep our seasonal decorations on the kitchen peep through window, so two of the cards from Tyler are here, along with a ladybug garland and the Catalog Valentine Heart Garland I made earlier this year.

This was actually a birthday gift, but Tyler made this stained glass heart for me too...which is really cool!

Also for my birthday, however the reds just go great with the Valentine's Decorations...and ladybugs are just too sweet!

Tyler colored this page for me back when he worked for Novo Ministries (a really great OKC ministry for inner city children) and gave it to me for Valentine's in 2013!
If you haven't noticed, this is definitely the third ladybug in this post...so everyone who knows me in real life knows that I have had a ladybug obsession since I was a child.

Lastly, this always stays out but I like to add it to the Valentine's list because it has a special story!  
After we'd been dating about six months, I got to go to Tyler's grandparent's anniversary party which is when I also got to meet most of his family that I hadn't met already!  When we were cleaning up from the party Tyler's grandpa wanted me to take the rose home, which I just thought was sweet!
Do you exchange Valentine's cards with your significant other?  
How do you decorate for Valentine's?
post signature

Sunday, January 26, 2014

DIY Love Birds Wooden Sign


Recently I've been making a few decoration changes to our apartment, as about a month ago I finally installed six shelves that were made by family members.  (I feel like "installed" fits the description better than "hang" because you don't just hang these shelves.  It takes a few hours of work and twice as many drywall anchors as there are screws - because the drywall anchors break with installation.)  

Okay, installation rant over.  But since I've gotten these shelves up, I've been trying to maneuver just the right decorations to go on them and under them.  This decoration was made to go under one of my shelves in the hallway.  (Although I like it so much now that I'm eyeing what I'm going to trade it with that is currently in my living room. haha)

First I started out with a piece of scrap pallet wood that I had already stained a few months ago.  Don't you just love the knot at the top?

I was inspired by this sign from etsy and decided to personalize it to what I was looking for!
I wrote the "love" in white lettering.  Using a pencil first helped me outline where my letters should go.

Next I sketched in the birds and color blocked them with white.  No pictures of the sketches because I could hardly see them with my eyes, so I know the camera wouldn't have picked it up.

Lastly - my favorite personal touch - is this blueish green color I painted the birds.  This paint is a free 8 oz Valspar sample that I got from Lowes (thanks to Tyler's grandma's coupon) and I just love the color!  The technical color is Redstone Blue Spruce for anyone who loves it too!

 My next favorite personal touch is the wire hanger I made out of a wire hanger.  Haha...pun intended!
As you can see, cut the wire to get it apart and straighten all the bends out of it.  
Wrap it around the end of the needle nose pliers (or other more uniform item if you have one) time after time until it is all curled.  
Once the whole wire is curled up, stretch it out to be the right length and curvature.  

Side note:  I'll be completely honest and tell you that this doesn't hang that well on a nail, nor is it likely to hang perfectly straight without being tweaked, but I do like the rustic look of it!  It does hang well on a hook, but still not straight unless you fix the curls so that one hangs perfectly in the middle.

 Now to fit your wire hanger into the wood, its time to get your drill.  Figure out which bit the wire matches most closely and drill into your sign with that bit.
Check and make sure your hanger fits into the holes.  Lastly, use some wood glue around the sides of the ends that will be inserted and stick them in and allow the wood to dry before hanging.

There is my lovely rustic love birds sign!  I just love the little birdies. 
I forgot to mention earlier that I went back and highlighted the edges of the birds with white so they would stand out better, as you can see in the above photo!

Here is where I hung my sign!  
I love that it is inside the frame that is actually painted the same color!
Psst!  You can read this post about repainting an old picture frame!
I think I have too many wood signs like this.  I should probably stop making them, but I'm an addict.  I just can't help myself.
post signature
P.S. I finally broke down and made a twitter account.  I swore I would never do this.
However, due to facebook's awful and changing business techniques, I feel Let's Drink Coffee, Darling may get better exposure with a twitter account.  The facebook account isn't going anywhere, but the addition of twitter is looking bright!
Come follow me on Twitter!

Monday, January 20, 2014

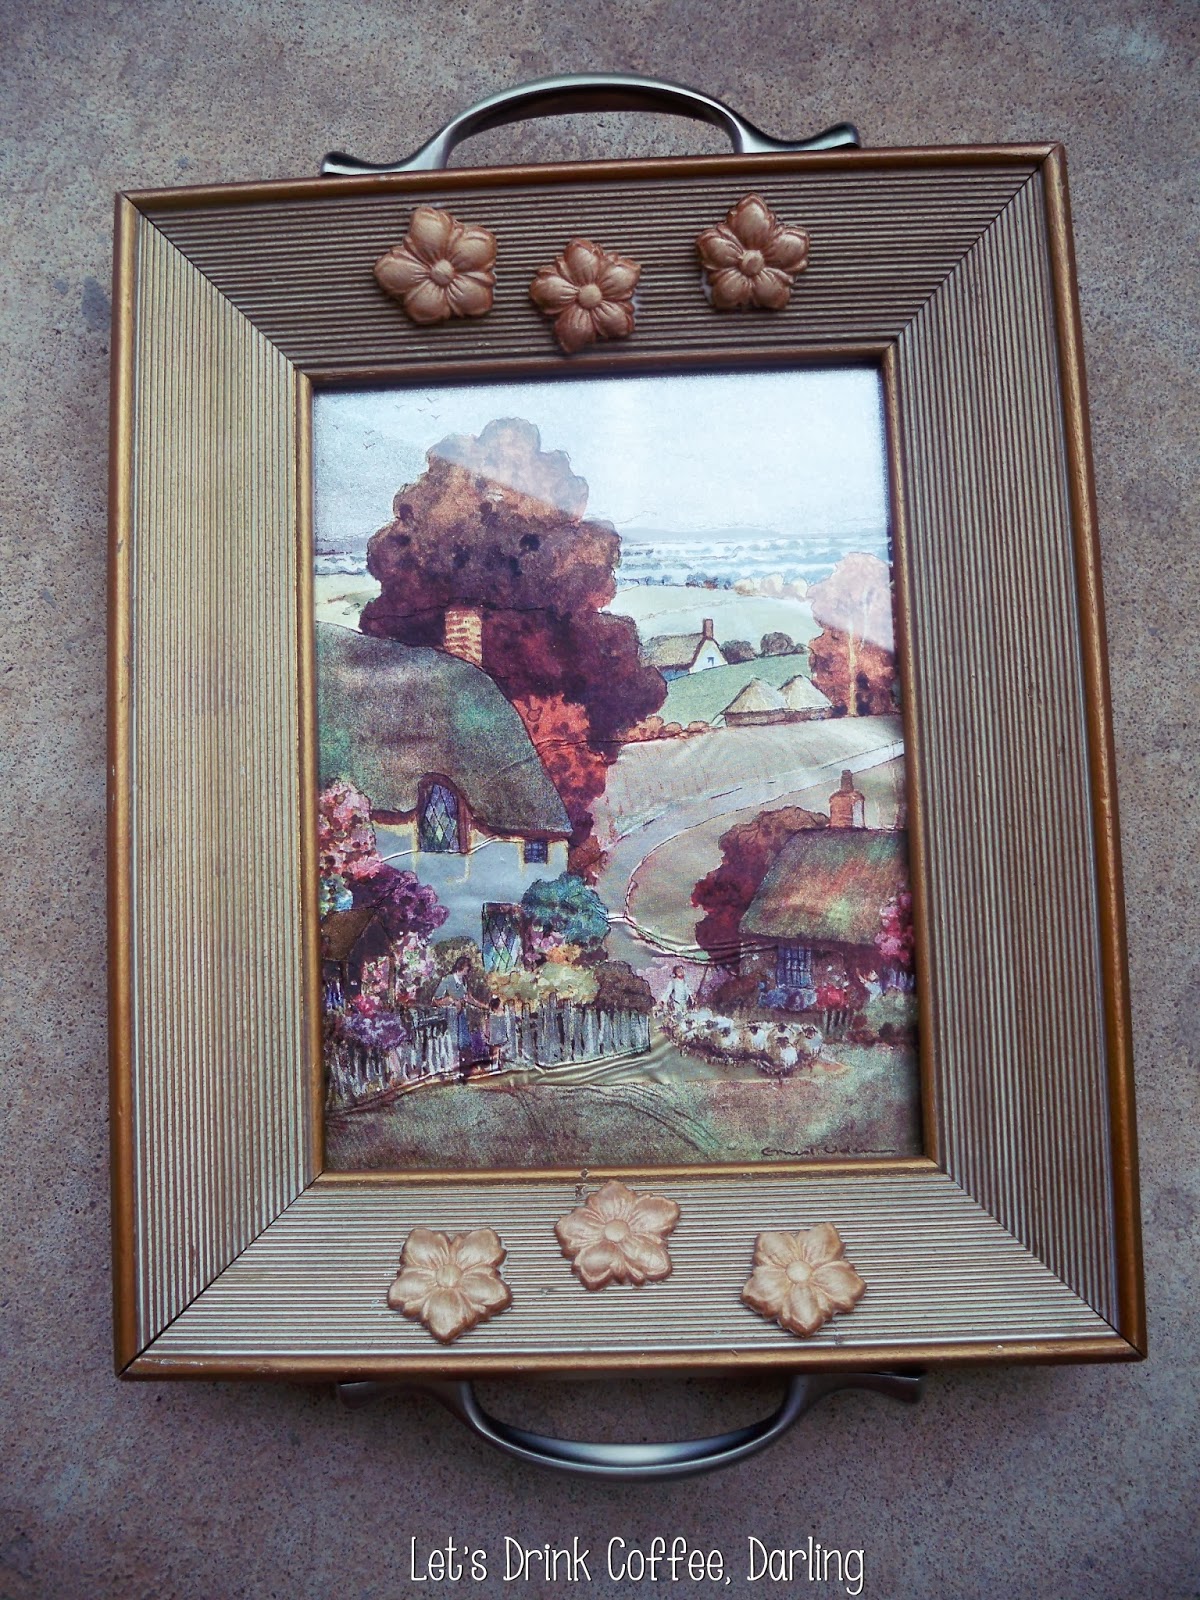
DIY Picture Frame Tray


 Last summer, my mother-in-law had us up and wanted to work on these little tray projects together.  She was making some things for her quilt guild and for Christmas presents, so we had a fun day of getting all those things ready.  That is why I'm just now posting this, since she made one for her mother, who reads this blog pretty consistently from what I hear.  (Hi Janice!)  I wouldn't want to ruin the surprise!

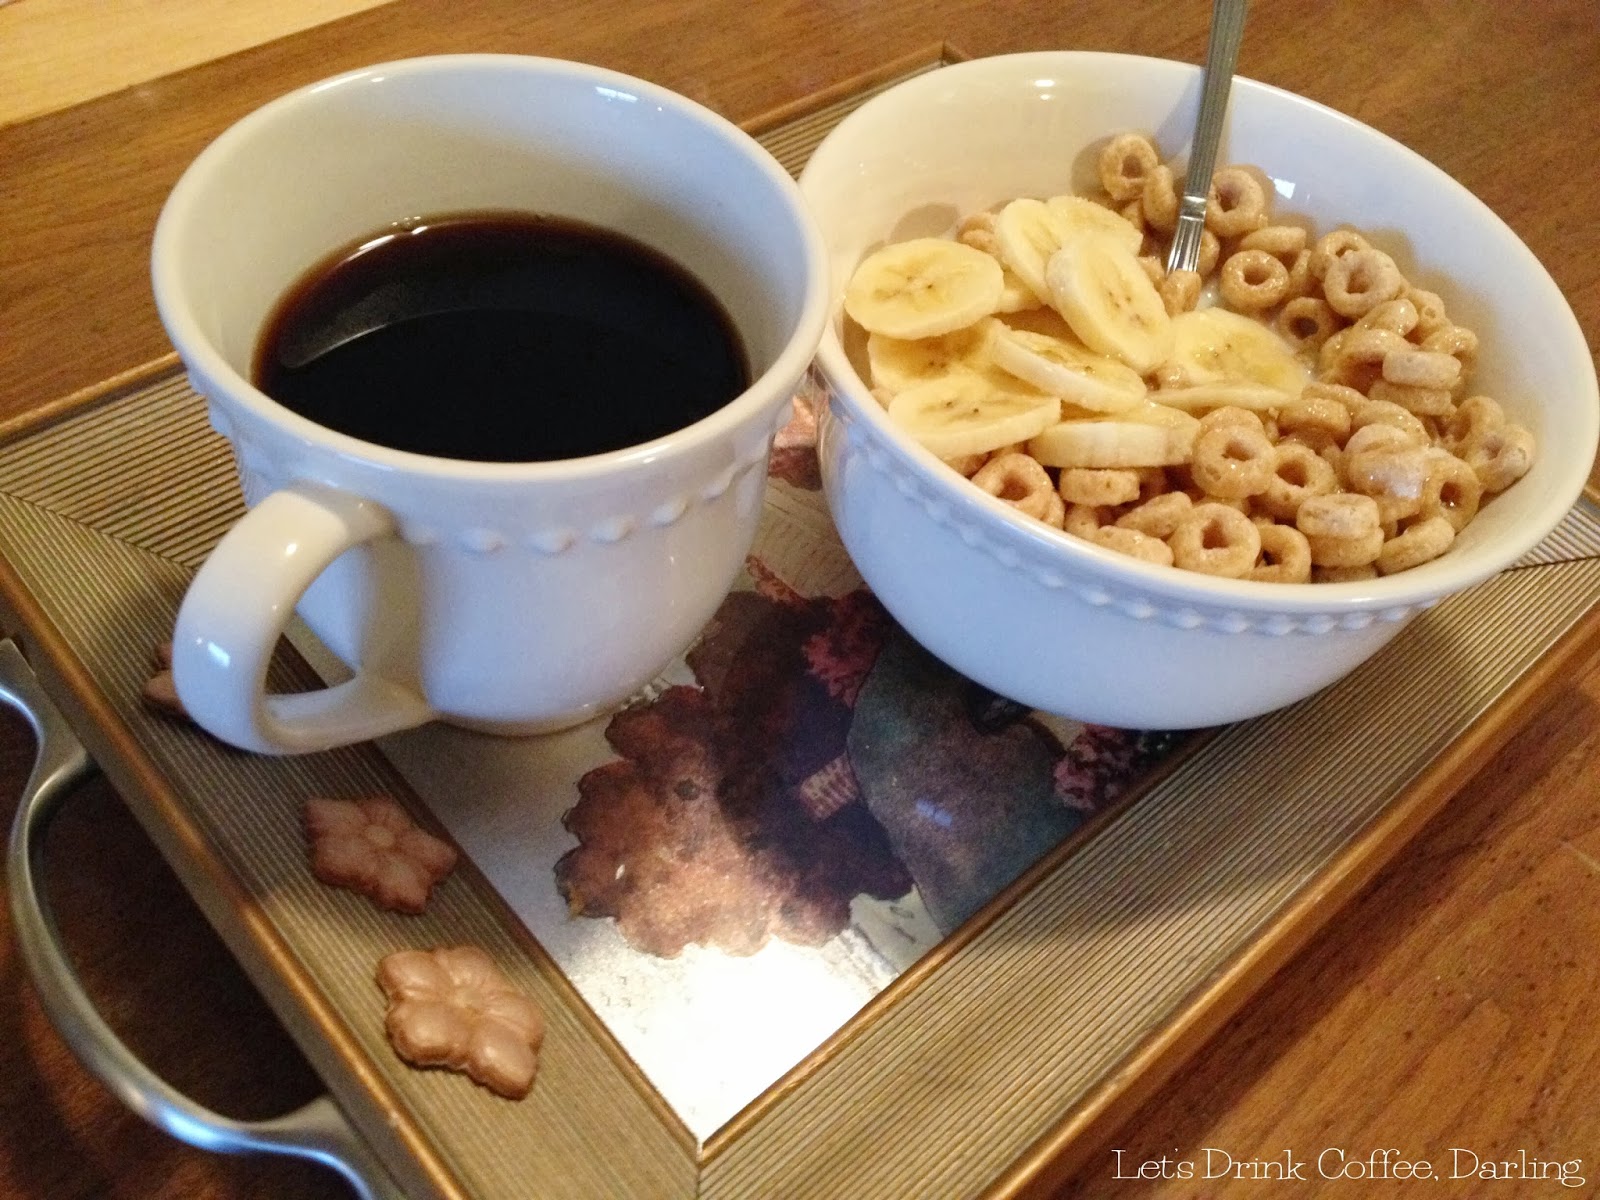
I'm also glad I waited to post about this, because Valentines day is coming up in just a few weeks, and I think nothing says romance like a little tray that works for breakfast in bed!  If you want to bring your honey some breakfast in bed (and please make sure there's a side of coffee), then this is just the perfect thing to bring it on!  You could even make your Valentine's card be inside the frame.

For this particular tray, the one I took home, we actually used cabinet door handles.  You really have to pick the type of handles according to the type of frame you find.  Every frame is different, so they all need a different type of handle.  Since this frame was very wide and had a thick flat surface on the edges, it worked great with the handles.  My mother-in-law also did some handles that were made with wire and beads.

I didn't photograph that part, but its pretty straight forward.  Mark where the screws need to be and drill straight down.  Since the screws go up into the handle, you'll probably need to drill a larger bit just up to where the screw head will fit flat against the rest of the wood.

On the back, we attached a floor tile so that the surface would be cleanable.  
I really didn't think cleanable was a word, but it isn't turning red, so on the blog it goes!

 Since we drilled holes into the face of the frame, we went to Hobby Lobby and found some decorative wood details to glue over the screw holes.  We used three on each side to make it seem more balanced and purposeful.

And there's the end result!  I just love the little picture that was already in the frame she bought!  If you can't tell, it is metallic.  It is just quaint, and works great with my white tea set!


Do you ever do breakfast in bed at your household?  Are you the breakfast maker and taker, or the breakfast waker?  


Friday, January 17, 2014

Valentine's Catalog Heart Garland

Valentine's Day is coming up!  I know a lot of us decorate for such occasions, and really...between Christmas and Spring, there isn't much else to decorate for.  That's why my hearts are going up in January.


If you're like me, you probably have a lot of old magazines or outdated catalogs lying around.  My hoarding issue comes to all the Pottery Barn catalogs...just because they are so pretty I can't throw them away.  Luckily, I found good use for some of their pages in my Valentine's decor this year!

What's so great about using catalogs (especially from Pottery Barn or another decoration type magazine) is the wonderful colors and patterns.  Many of my cutouts came from the bed and bath catalogs, so the patterns are pretty big and soft looking.  


First, go through your catalogs and magazines that you don't want anymore and rip out all the red and pink (or other color of your choice) pages.  Have scissors, invisible tape, and fishing line or other clear or white string on hand.  


Fold your paper like you're in kindergarten and cut out hearts of many shapes and sizes on the fold, being careful to stay on large patterns of the color you want.  Your hearts can overlap on multiple patterns for unique looks.

Once you have your hearts cut out, arrange them on the string and tape them down.  If the back had writing or didn't fit the color scheme I wanted, I would cut out another heart the same shape and size to tape on the back, as they tend to spin around.


Keep taping various shapes and sizes until you have the length you want.

Then the last step is hanging them somewhere in your home!  I chose to hang them under the kitchen pass through window where I have a few other Valentine's decorations.


This was a really quick project, and I've enjoyed seeing my hearts spinning all day!  Plus, you can't beat patterns out of Pottery Barn catalogs!


See HERE how we use our old Valentine's Day cards from each other as decorations!

Sunday, January 12, 2014

DIY Tic Tac Toe Board {Pottery Barn Inspired}

Are you looking for a great gift for your sweetheart, or a fun game to play with your kids?


Look no further, especially if your significant other loves to play games, loves handmade things from you, or just likes Xs and Os.  


Right before Christmas, I spotted this gem in my Pottery Barn catalog (I have a hard time calling them catalogs since I really look at them as home decor and inspiration magazines).  Tyler loves to play games, and had been hounding me for weeks to play something with him. 

This seemed like the perfect little gift for him that I could make.


Let's get started with a shopping list, shall we?

Materials:
9 - 1x1 inch blocks
1 - 4x4 inch platform
1 - 1/2 inch square dowel rod*
9 'O' Metal Letters
9 'X' Metal Letters

Tools:
Wood Stain
Wood Glue
A Drill
A Hand Saw
Sander*

*I also used a small round dowel that I had around for two of the sides because my blocks were fitting too tightly after staining.  If you want your encasement to have complete walls, I'd suggest sanding the 1/2 inch square dowel sides so that the blocks don't fit so tight.

I found the majority of my supplies at Hobby Lobby:  the blocks and platform were in the woodworking section.  The Xs and Os were in the clearance section, so you might have to find these elsewhere in the future.  It looks like they are still available HERE on the designer's website.

First off, you'll want to stain your blocks and platform.


 Put all 9 blocks on the platform for measuring purposes to ensure you don't get your walls too tight for them.


Cut the dowel.  The top of my platform was 4 inches by 4 inches.  I cut the two square dowels to the full 4 inches, and then the two round dowels to about 3.5 inches.  Stain them as well and let them have a good long dry before you start putting things together.


I didn't get photos of this process because I was rushing to get done before Tyler came home from work.  I'll explain the best I can.


I used small leftover pieces of the round dowel to create wooden pegs to keep the sides more firmly attached to the platform.  To do this, drill holes into the platform and into the bottom of the sides that is the size of the dowel rod.  You will insert a the round dowel into both holes and use wood glue to keep them in place.  I'd also run some wood glue along the bottom of the side wall when you attach it.  


If you're doing two ends the way I did with the round dowel, drill into each end of the interior of the sides.  Glue the dowel in place prior to final insertion.  It was somewhat complicated to get it all together in the end with glue and all, but you'll figure it out.  


 Put your adhesive letters on the blocks, and you're ready to play tic tac toe!  When placing the letters, it is my suggestion to make sure the grain of your blocks are going a similar direction for the best looking results.  I attached my letters on the end grain so the sides would be uniform.


These are pictures of the finished product!


Copyright 2012-2014 Saxon Smith (Let's Drink Coffee, Darling). All rights reserved.
Related Posts Plugin for WordPress, Blogger...
UA-49062203-1