Showing posts with label creategifts. Show all posts

Tuesday, December 1, 2015

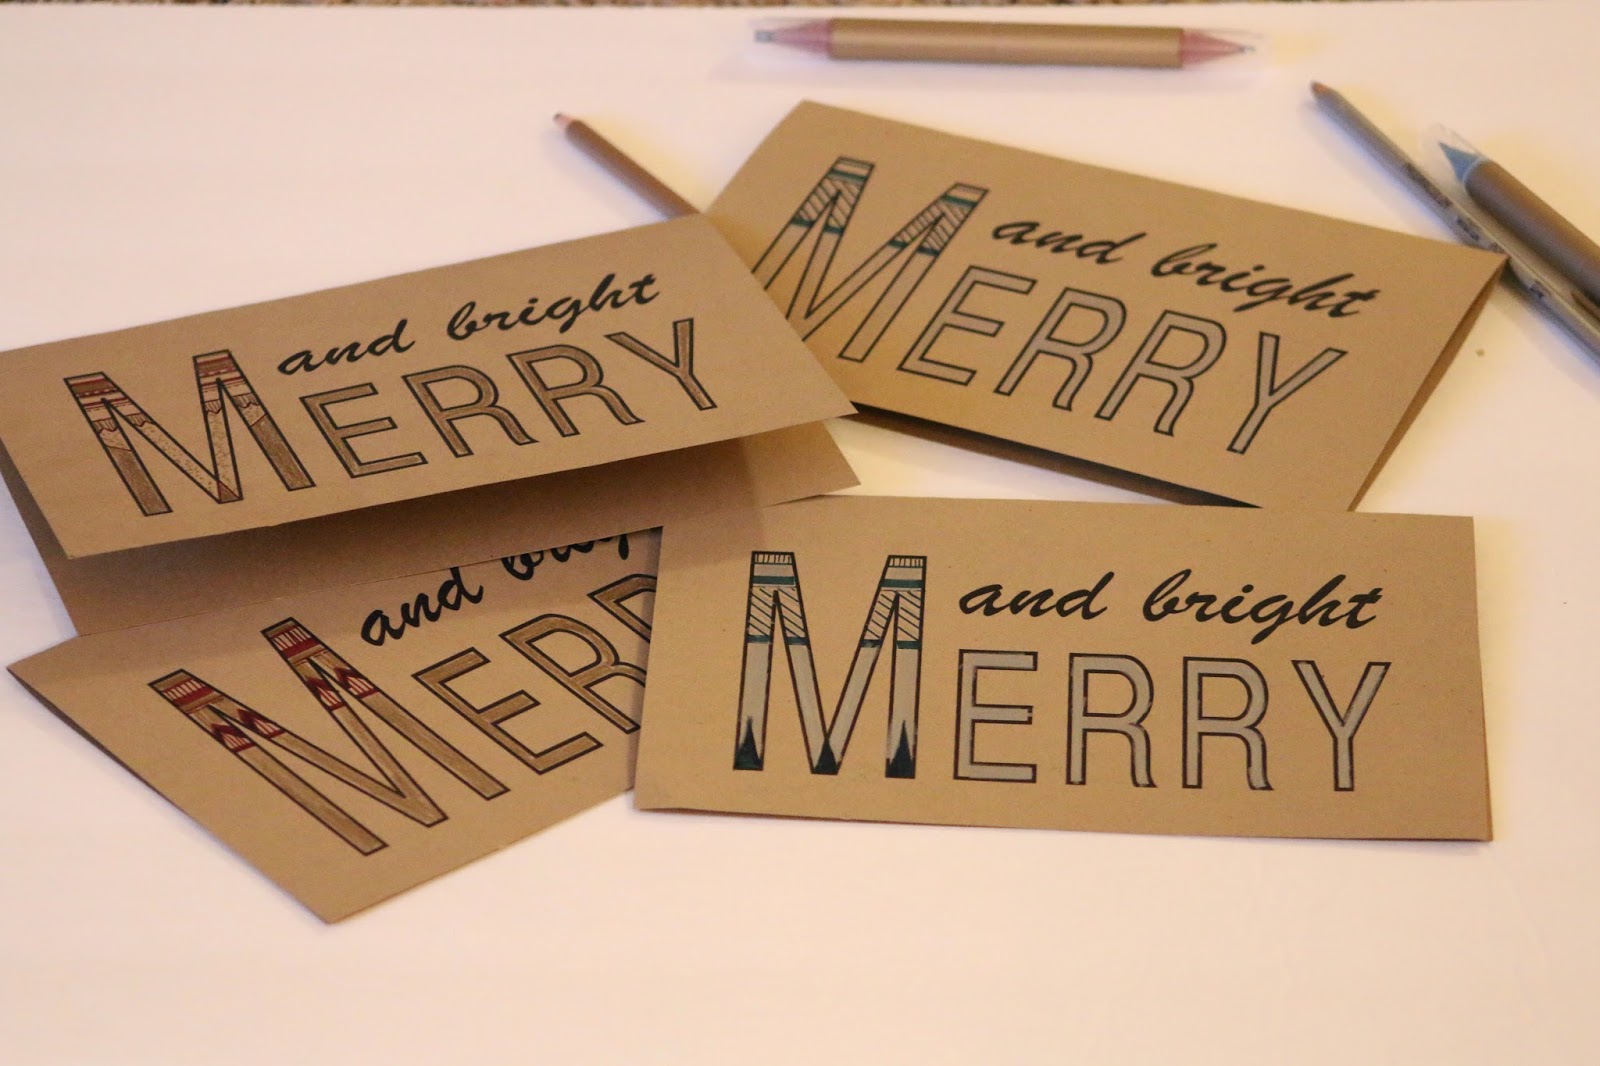
DIY Christmas Card + Printable


Every Christmas, I try to send out some Christmas cards to family and close friends.
I don't tend to like buying cards at the store because it feels less thoughtful to me, however making twenty-something individual cards is just too time consuming.  
Last Christmas, I decided to put my creativity to the computer about 6 handmade cards into the season.  I still made all of our cards, but this time I could mass produce the results much more efficiently.

After I designed the card, I printed it on craft colored card stock in black ink.  Printing the inside message is as simple as flipping the paper over and printing on the other side - unless you have a fancy printer that does the flipping for you.


Using the open source program Scribus, I took the design from one of my hand drawn cards and put it into effect on the computer.  It was very simple text placement, but allowed me to make some small handmade changes to each card to still give it a handmade approach.
Handmade Inspiration

 Card in Scribus with Hand-Drawn Details

Interior card message.

  Using a straight edge, markers, and prismacolor pencils, you can use this generalized card to put some handmade touches to all of your cards.


Adding those embellishments are as easy as this - just make a mixture of horizontal, vertical, thick, and thin lines.


I tried to stick with Christmas or winter colors like reds, greens, blues, silver, and gold in the colors I used.  Let Christmassy patterns inspire you like candy canes, Christmas sweaters and snowflakes.


This year, maybe you're like me and like to add some handmade touches to your cards, but don't want to design them yourself?  You're in luck, because you can print this card for free at your home!


Below are two links, one for the front, the other for the inside of the card.  
Link to Merry and Bright Card FRONT
Link to Merry and Bright Card INTERIOR
I hope the printable will serve you well, and get your creative juices flowing this holiday season!  Or maybe even hand it off to the kids to make and send out!
Merry Christmas!
post signature

Sunday, June 14, 2015

DIY Herringbone Linoleum Stamp + Making a Card


Back in high school art class, I once made a linoleum print, which was my first and only time to work on that type of project.  Although that project was quite time consuming and large, here I am seven years later taking it on once again, however this time much smaller and with a greater variety of uses.  I've used the herringbone print to create backgrounds for a couple different cards so far, and believe it will be even more useful with a larger variety of inkpad colors.

To do this project, you'll need a piece of linoleum that you can find your local arts and crafts store, as well as a linoleum cutter starter set.  I bought a 4" x 3" piece.


 Here you can see the different types of blades you'll get in the starter set.  Some are for cutting large pieces of linoleum away, others for detail work.


On the long edge, make marks every inch on both sides of the piece of linoleum.


 Use a straightedge to draw a straight line from one side to the other.


Along the short ends, make marks every centimeter, and do the same connecting each tic mark across to make straight lines.


Now you have an easy grid to help keep your herringbone diagonal lines going at the same angle.


Continue using a straightedge to draw diagonal lines.  I chose to not have every line meet up for a mismatched appearance.


This is the blade I chose to use to cut out the lines for the herringbone pattern.


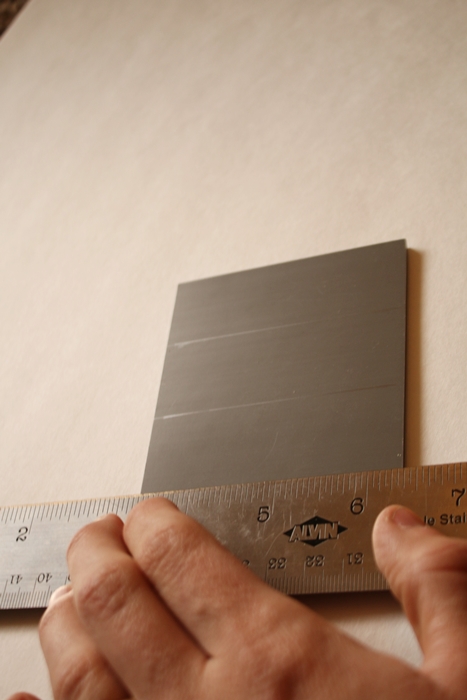
Use a metal straight edge along the side of the blade to ensure you cut the line straight.


 Always make sure the cut is deep enough that it won't show up when stamped on paper.


 Just cut out every line you drew with the tool until you're done.


My final result.


Now you can test your creation out with ink.


 My linoleum pad is larger than the ink pad, so I just had to blot it all over until the ink appeared even.


Press the linoleum on paper and press down all around it.


The ink didn't transfer completely due to the textured paper, but I preferred it this way so that I could write on top of the pattern.


Later, I brought out the calligraphy pens to make a card for a wedding we had earlier this year.


Since the herringbone transfer was only about 50%, it allowed the 100% transfer of the calligraphy ink to stand out over the pattern.


Linoleum prints are a great way to create handmade crafts that you can continue to use over and over!  Just remember that whatever you do on the linoleum block will transfer backward!



post signature

Saturday, April 5, 2014

How to Make Beautiful Custom Maps

Do you love maps?
There are many reasons we might choose to have a map of certain places.  
It might be where we live, a place we visited and loved, or a map to use for a project.  You might want to print a picture of the place on the map where you or a friend got married, where you studied abroad, or your favorite vacation spot.  There are lots of reasons maps are cool, not to mention all the nifty map crafts that are popular right now.  
I wanted to show you my favorite website to go to when I want to make a map of something.  It is called maps.stamen.com, and it is a really versatile FREE website where you can choose anywhere on earth to make a map.  It even will create an image that you can save that is up to 2000 pixels.
This website is also perfect if you are designing your own wedding invitations and want to include a map.  (I just kick myself every time for not knowing about this website when I was still making my invitations!)


Okie dokie, are you ready to get started making your own map?!
Go to maps.stamen.com and it will bring you to this page.


Use the search box in the upper left corner to type in the location of which you would like to make a map.  You can change the type of map by clicking the two previews on the right side, or choose from even more map styles by scrolling down.


I chose Oklahoma City, because that's where I live.


It was originally set on terrain, but I decided to switch to toner.  Toner would be the PERFECT way to make maps for wedding invitations.  Literally, it would be just perfect.


You can also zoom in and out using the yellow buttons under the search box.  I decided to get a little closer.
To get rid of the previews for other maps, click the yellow button in the bottom left right beside the current map style you have chosen to get rid of them.  This also opens up the ability for you to make an image of a specific location or embed the map onto a webpage.


I want to create an image, so in the upper right corner I clicked <image>.  


Doing so brings you to this page, where you can set the size and proportions of the picture.  You can also change map styles here.  The yellow box shows you the constraints of your map, and you can drag the map around until you get exactly what you want inside the yellow box.


Once you adjust all your settings, you can click "Make" in the upper right corner.  It will begin to process your map image, which sometimes takes a little while.  When it is done, you can click the map in the top of the queue on the right.  


After you click your map, it will bring you to this page where you can right click and save it.  


Here's how my map of Oklahoma City turned out!  


This map is another one I made of Oklahoma City in the terrain style.


One of my favorite settings to make maps with is the watercolor style.  They are just simply beautiful.  I made a map of the neighborhood I lived in while studying abroad.  I just love the colors, it is so pretty!


 I can't even name all the wonderful possibilities you can do with Stamen Maps, but I have lots of ideas that I'd eventually like to use it for.  


Do you like to use maps in your decorations?  Or are you wedding planning and needing a beautiful way to send a map in your invitations?  I hope this little gem is helpful to anyone else who loves travel, maps, and beautiful images!
post signature
I would like to note that I am not being compensated in any way, nor have I been contacted by Stamen maps.  I just really love their website and want to share!
Copyright 2012-2014 Saxon Smith (Let's Drink Coffee, Darling). All rights reserved.
Related Posts Plugin for WordPress, Blogger...
UA-49062203-1