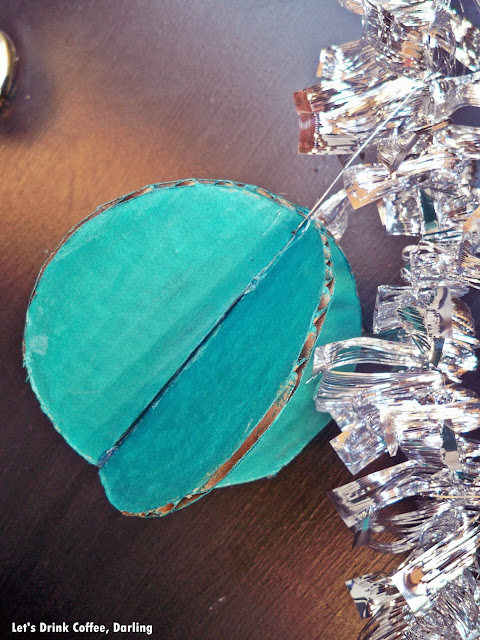
I was asked last month if I would help decorate at our church for a Christmas party.
Our church meets in a middle school on Sunday mornings - so that means that everything that goes up must come down each week. And I mean everything - chairs, instruments, screens, cords, the entire nursery, toys, tables, chairs, rugs to go under the chairs so they don't scratch the gymnasium floor, etc.
With that being said, the fact that our set up is very temporary - and the fact that it is in a middle school - things often aren't too aesthetically pleasing. That's okay, but for a little change we are planning to dress up the cafeteria when we have our Sunday Christmas Lunch.
If you remember for Thanksgiving, I made a huge banner. When I got it there, it was really hard to find a place to hang it. This time I'm thinking ahead and making large but lightweight ornaments that can attach to the dropped ceiling.
I'm just going to show you one of the icicles since it is the most complex and if you get this one then the rest should be more than straight forward.
For starters, you'll need two pieces of cardboard approximately the same size.
For the icicle shape, I used my circle template and went down in a row. If you don't have that, you could use a compass or free hand it.
To make things precise, I drew a line down the center so I could line the rest of the circles up.
Draw the next circle. I drew the same size circle usually about 3 times before moving to a smaller one.
Next size down...
After you draw a line of circles, its time to get your box knife and cut along the outer lines.
Halfway done cutting and looking good!
Here is my first piece cut out. Now I prefer to trace this cut out to do the other one. It is easier that way, but if you want to be more precise be my guest at drawing the shape again.
Now that you have both cutouts, you'll need to cut the middles so they can fit together properly.
Using a ruler, measure approximately 1 inch up from the bottom and draw a perpendicular line. Do this with both pieces.
On one piece, cut a sliver of cardboard away from the middle going down from the one inch mark. On the other piece, do the same only cutting the middle away going up.
Once they are cut like this, the shortest cut will go down the longer cut and fit together. I hot glued mine to make sure it was sturdy.
After you glue, its time to paint! On the icicles, I thought mixing silver and blue would look phenomenal.
Partially painted...
Now the icicle is drying.
Here are some other ornaments I made, including a longer icicle.
I'm going to be honest and say the icicles are my favorite.
 |
| Add caption |
Here are some detail shots...
 |
| The small icicle. |
 |
| The large icicle. |
You'll do the exact same process with any other shapes as I did with the icicles. Cut out two of the exact same shape, and make the cuts in the middle so they can slide together. Just have fun with it!


That is so cool! I would never have the ingenuity to come up with that by myself, but now I most definitely want to try it!
ReplyDeleteIt is so much easier than you'd think! At first I was nervous about putting them together, but after the first one it is really straightforward and easy!
DeleteThose are so creative!!! :-) What beautiful decorations. :-)
ReplyDeleteThanks Susannah!
DeleteThose turned out really cool!! You must be the go-to girl when it comes to homemade decorations!!
ReplyDeleteThanks Rachel! Haha, I suppose not as many people who know me in "real life" see the same ornaments you guys see, so I'm only the go-to ornament girl for myself! ;)
DeleteHi Saxon, I saw this at Show Stopper Saturday. What an awesome idea! Oh, the different kinds/colors you could make and so inexpensive too. Me and my girls might have to make a few for our house. Thanks so much for sharing :)
ReplyDeleteThanks Meg! Hope you'll get a chance to make some with your girls! :) I'd love to see them if you do!
DeleteThey look great! (You are so patient tracing all those circles all accurately!) Also, I sympathise with you about meeting in a school hall... our church in SA also met in a school and, EVERYTHING needed to be set up... We'd get there at 7:00 for the service to start at 9:00.
ReplyDeleteHaha, tracing the circles really wasn't too bad since the template had marks where I could line them up on the center line!
DeleteYes! We spend about that much time to get ready for our service too. I think the worst part is that Children's Church is in the cafeteria, and the kids try to climb on the tables (which could be dangerous) so it makes corralling them that much more fun! haha
I love this!! I'm pinning this so I don't forget it :)
ReplyDeleteAw, thanks Catherine!
DeleteI like those icicle ones!
ReplyDeleteThanks girl!
DeleteVery cool! These will look great at your party! Thanks so much for linking up to the Handmade Holiday Link Party!
ReplyDeleteThanks so much Alexis!
Deletei so did not realize those were cardboard from the original picture. what a great idea. thanks for linking up with the all things pretty party.
ReplyDeleteThanks for stopping by!
Delete