Showing posts with label create. Show all posts

Saturday, April 11, 2015

Simplistic Spring Wreath


It is finally Spring, after all that snow the US had this winter!  Finally. 

I've already had to keep the weather on all evening due to severe weather, had tornado sirens go off in my area, video crazy hail and wind, worn shorts and flip flops, and do some deep spring cleaning in our apartment.

Earlier this year I was inspired by a simple wreath I saw on Pinterest.  I don't make it to the craft store often, but had some extra time this weekend while the husband was on a camping trip and took some time to get the supplies.  What I loved about this wreath idea was that it was mostly fresh looking greenery and wasn't focused on colors or being completely full and covering the whole grapevine.  


Products:
Two bushes of greenery (varying textures)
Single stem of light colored flower
Grapevine wreath

Supplies:
Wire Cutter
Floral Wire (or other small wire)


I really envisioned the focal point of this wreath being in the lower left part of the wreath.  I took the longer stem of greenery, snipped the stem about halfway, and then stuck it into the wreath.


Then I cut off a small section of the boxwood and sat it aside.  I snipped half of the long stem off and also stuck it in the wreath, angled just above the dangling greenery.


Then I took the small piece I sat aside and angled it coming out the opposite direction as the larger boxwood.


Next, I took the rose and experimented with how it looked best.  I determined that I would need to curve the stem close to the flower and then stick it directly through the wreath so that it would sit the way I wanted it to.


Once the stem was through the back, I wrapped it under one of the main stems holding the wreath together.


I kept wrapping until the stem was fully hidden behind the wreath.


The stem was curving out past the front of the wreath in one place where it was curving, and since it is more red than the other branches it was noticeable.  I took some floral wire to tack it down in the back.


 I just wrapped the wire around the stem and some branches in the back to help pull it out of sight.


Next, I needed to tack down the small branch of boxwood because it didn't have a stem long enough to ensure that it would stay put.


My camera battery died, so I didn't take pictures, but I also just made a loop of wire in the back to hang it to the door knocker on our front door.


My favorite part about this wreath is how simple and fresh it looks, and really adds some life to our otherwise drab door!

HAPPY SPRING!


post signature

Monday, August 19, 2013

A DIY Burlap Box

http://letsdrinkcoffeedarling.blogspot.com

I made this DIY box shortly after we moved into our apartment this summer.

I didn't take pictures before or while I made it (sorry), but I assure you of three things:  it was time consuming, it wasn't that hard to do, and it used a lot of freaking glue sticks.

letsdrinkcoffeedarling.blogspot.com

It started off as a cardboard box...a really sturdy cardboard box.  

It was the perfect size to fit in my small entertainment stand...and since right after marriage Tyler and I were moving in together and trying to merge all our things together, I suddenly had to accommodate for a ton of video game equipment in my tiny little entertainment stand.

letsdrinkcoffeedarling.blogspot.com

I first glued an interior lining fabric to the inside, so it would be easier to clean dust and such things out.  Then I worked from the bottom up gluing the burlap (that was a leftover gunny sack from our wedding) to the exterior of the box.  After several hours and a jar of glue sticks, I now have a good way to conceal (or hide, as Tyler puts it) all the video games!

letsdrinkcoffeedarling.blogspot.com


Probably the cheapest storage container we own!

(If you're looking for similar gunny sacks, you can buy them at Atwoods).


Monday, August 12, 2013

Burlap Lampshade Makeover


Not long ago, I set out to redo an old lampshade I had that had turned lumpy, dusty, and just not good.  I wish I had a picture of the old one so you'd know just how bad it was.

Most of the problem was there was no structure in the old lamp shade, just one circular piece at the top, and another at the bottom, with only fabric between the two metal pieces.  This was making the shade hang uneven and looked lumpy.

I cut the fabric off the original shade, and began to work on my new shade.

Here's what I used:
The metal parts of the original shade
Straightened wire hangers for extra structure.
Burlap
Trim

You'll also need a hot glue gun, scissors and wire cutters.


First, I attached the top part of the original shade to the lamp, and measured to where I wanted the shade to end...about 12 inches.


I then used my handy dandy cutting mat to cut my (already ironed) burlap to the correct length (remember to allow extra to glue around the metal parts).


Before attaching the burlap to the shade, I glued a strip of hot glue on the back around all the edges to prevent fraying while I worked.


I used the hanger strips as "lamp shade boning," per se.  I mainly needed to stiffin the shade between the top and bottom so it wouldn't end up lumpy like it was originally.  Then I started glueing the circular pieces to the fabric.


I added more structure, because it was still appearing lumpy.


Once I was finished with the basic structure of my new shade, I topped it off by adding some embellishments.

On the top, I glued a brown ribbon to cover the fray and hopefully keep the fabric from coming undone.

 On the bottom, I attached a floral white trim.
(This was actually supposed to be part of the garter that I never made...)

This burlap flower was attached to the wedding gift that Tyler's parents gave us.  She basically wrapped our gift in things she thought I could craft with - which was a great idea!

Here it is completed!

I put it in our living room behind the couch so that it flips on with the light switch!  

 I think the large flower really makes this lamp shade...plus I just love how it is no longer lumpy like it used to be!


And there you have it - our lamp shade redo!


P.S. Let's Drink Coffee, Darling is now on Facebook!  Don't forget to go and like the page!

Friday, August 2, 2013

Easy Curtain Tiebacks

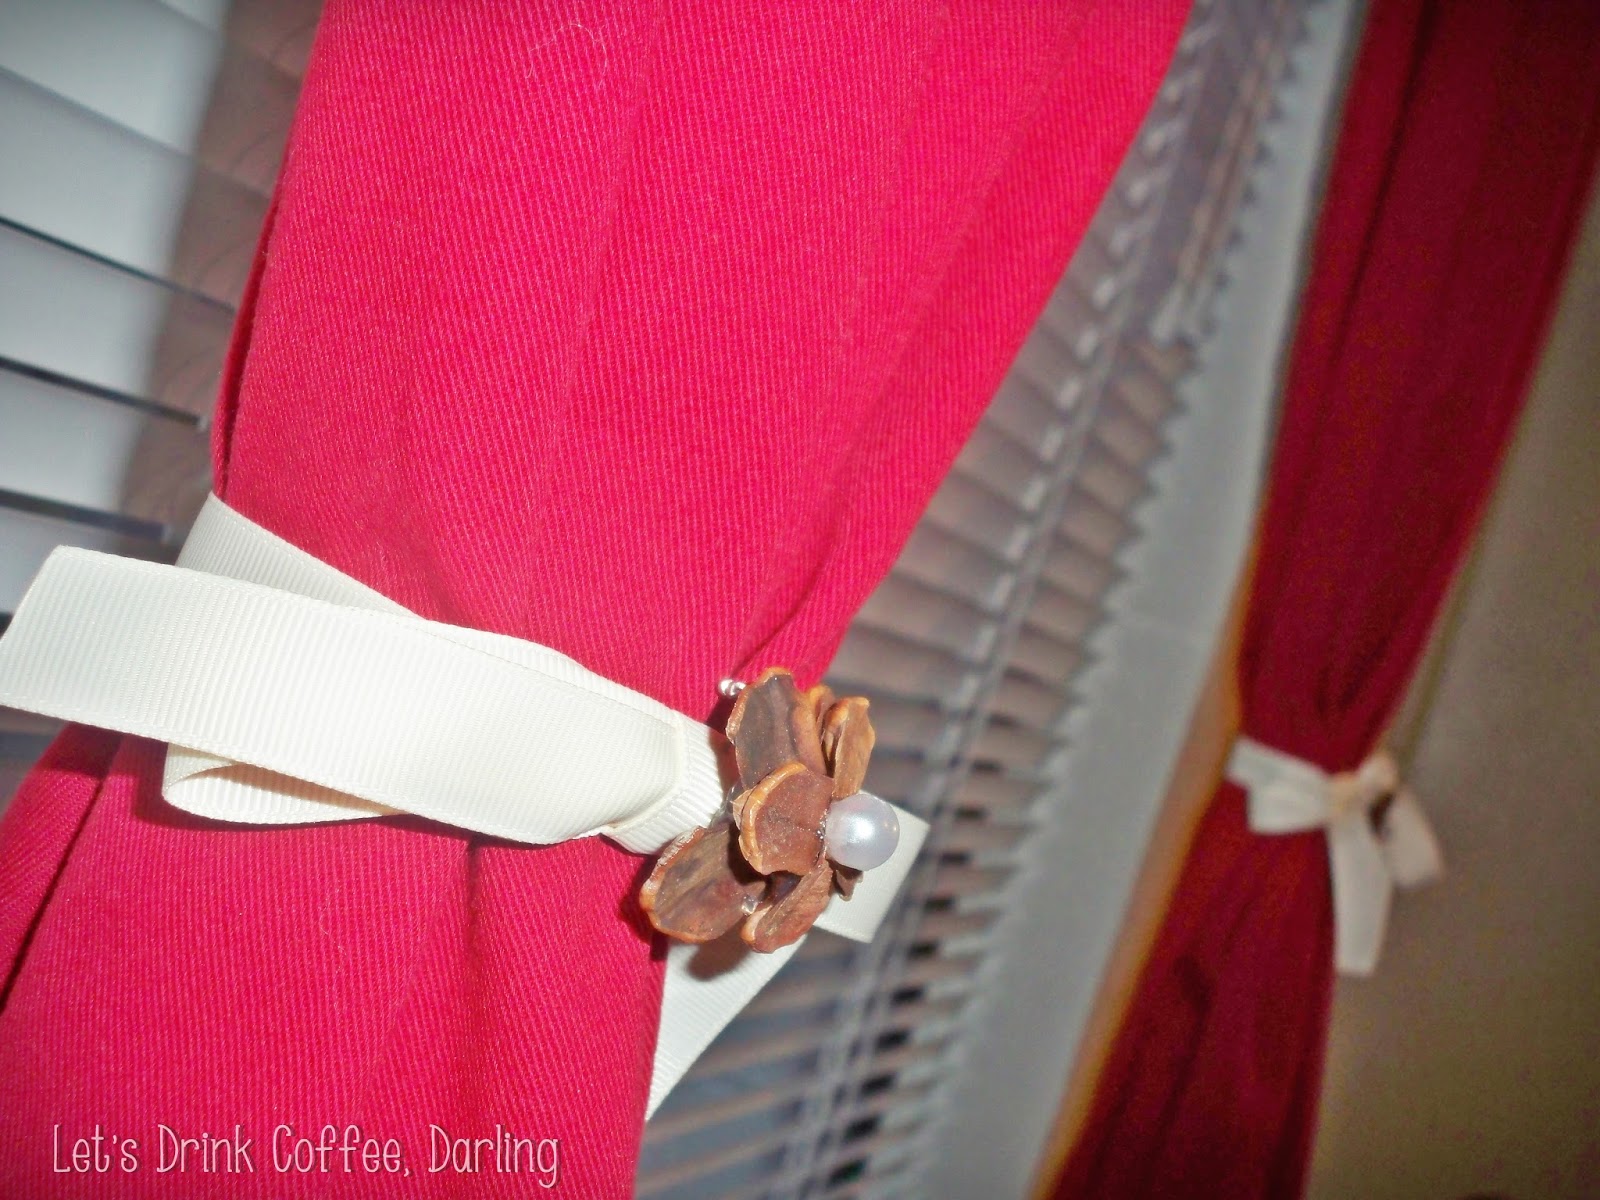
Today's post is simple:  it involves ribbon and leftover wedding boutineers.  Of course, you could always use a button or other pennant that matches the decor in your home.  I'm just trying to use up our leftover wedding stuff!


We hung some red curtains up in our office in effort to add some insulation to the window and some color interest to the room.  We recently set up our fish tank in front of the window to give them some natural light - as the tank hood lights recently rusted out and won't work.  The curtains without being tied back were looking pretty shapeless, and taking too much natural light from the room.


I just used an excessive amount of ribbon to tie a loose knot around the panel.  Then I used the boutineers (they have a bar pin on the other side) to pin through the center of the knot.  It really kills two birds with one stone, by keeping the bow in tact and creating a focal point.


The brown boutineers tie in with the cork colored buttons at the top of the curtains, while the cream colored ribbon ties in with the small dresser the fish tank sits on.


Since we're talking about the fishies, here's a little update since the move!

They really didn't like moving again after the wedding!  They weren't too happy with us after the car ride, but they're all settled now and have forgotten all about it!

Moe is being his normal self - lollygagging around and pretending not to eat when I feed him.
I know you eat, you little bugger, because you've lived for 6 months.
He's a trickster, I say.

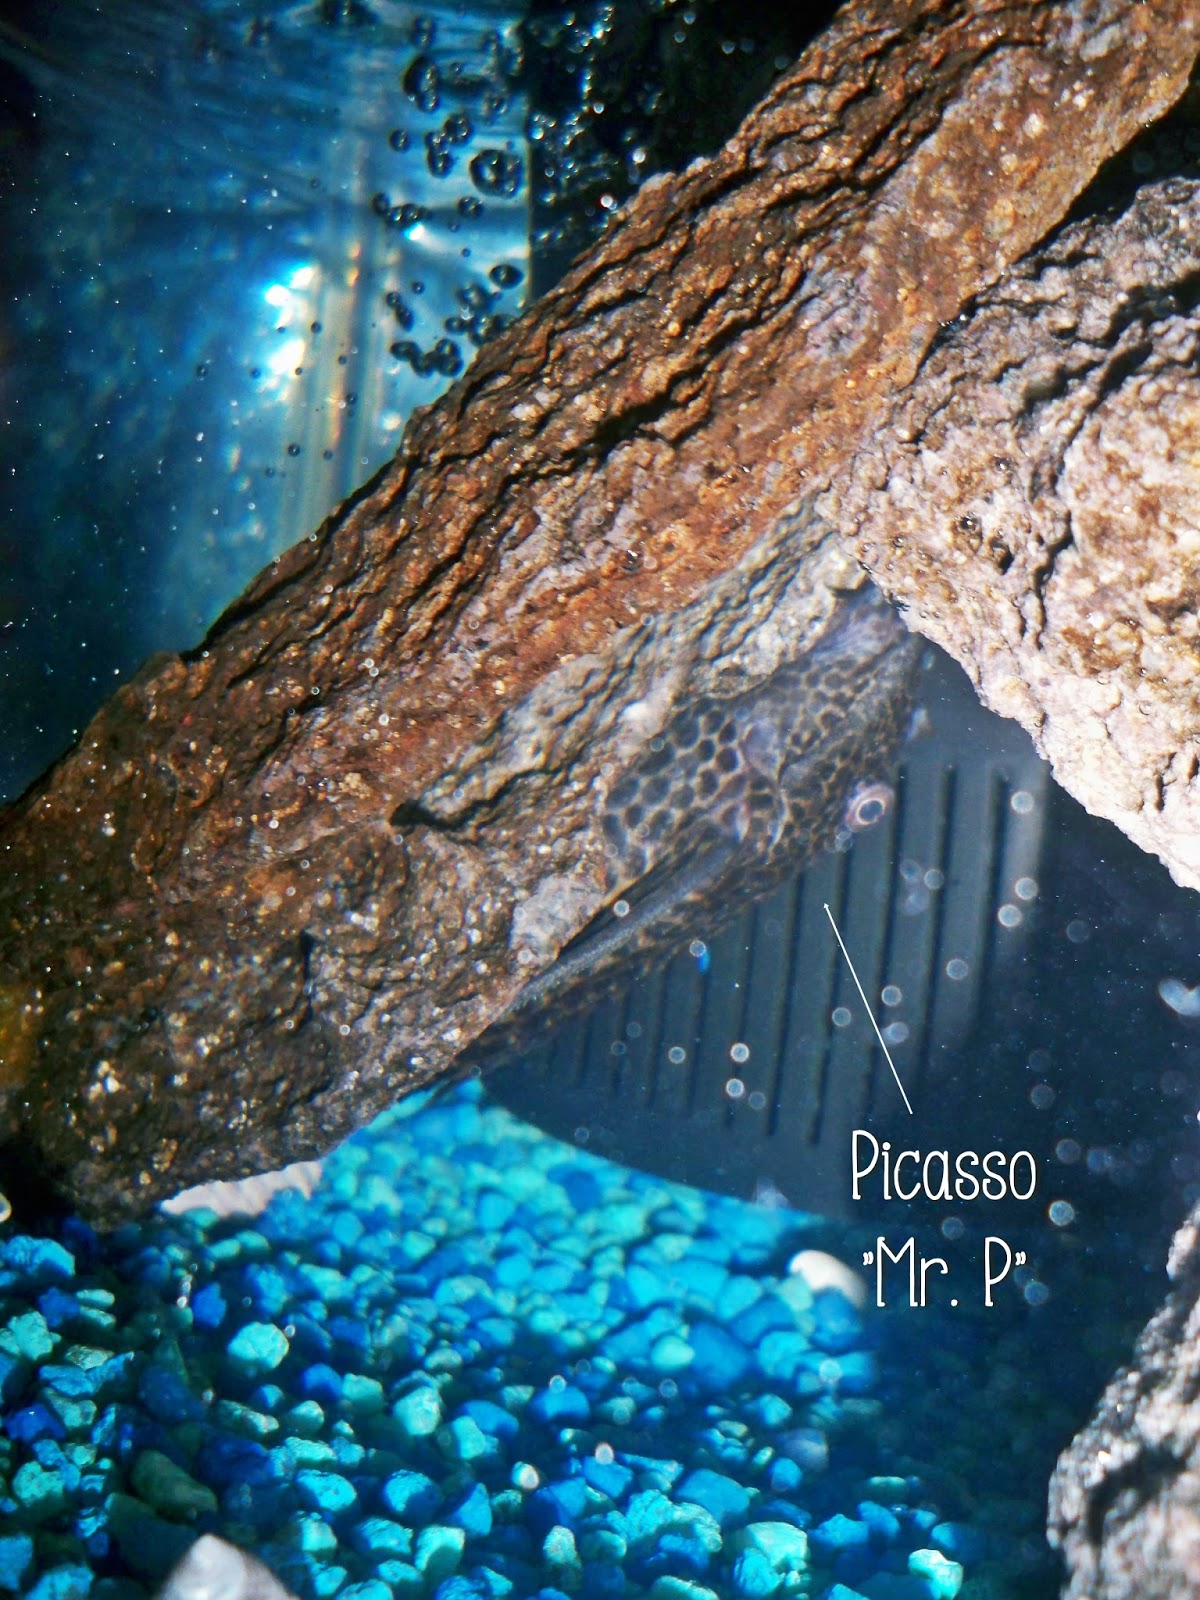
And Picasso is being his usual self as well - hiding under the rock and acting all scared when we turn the office light on.  Don't be a fradie fish, Picasso.  I pointed him out so you could see him...he's been into the camo style his whole life - guess it's not just a phase.

Picasso and Mr. P are aliases...because when he lived with Tyler's mom he was "Mr. P," but when Tyler brought him to me, he told me he didn't have a name.  So now he is Picasso and Mr. P.  I figure they work well together.

P.S. If anyone is interested, I sell these boutineers on my Etsy shop, LoveCoffeeDarling!


Copyright 2012-2014 Saxon Smith (Let's Drink Coffee, Darling). All rights reserved.
Related Posts Plugin for WordPress, Blogger...
UA-49062203-1